Airframe Rail Button attachment
This is how I made the rail button attachment on a minimum diameter rocket airframe. I used 8-32 bolts for attaching the rail buttons.
I start with an 8-32 T-nut. I drilled a hole in a scrap piece of wood and cut both sides of the t-nut as shown. I used a Dremel tool with a cutoff wheel. You can see that the t-nut got pretty hot during the cutting process.

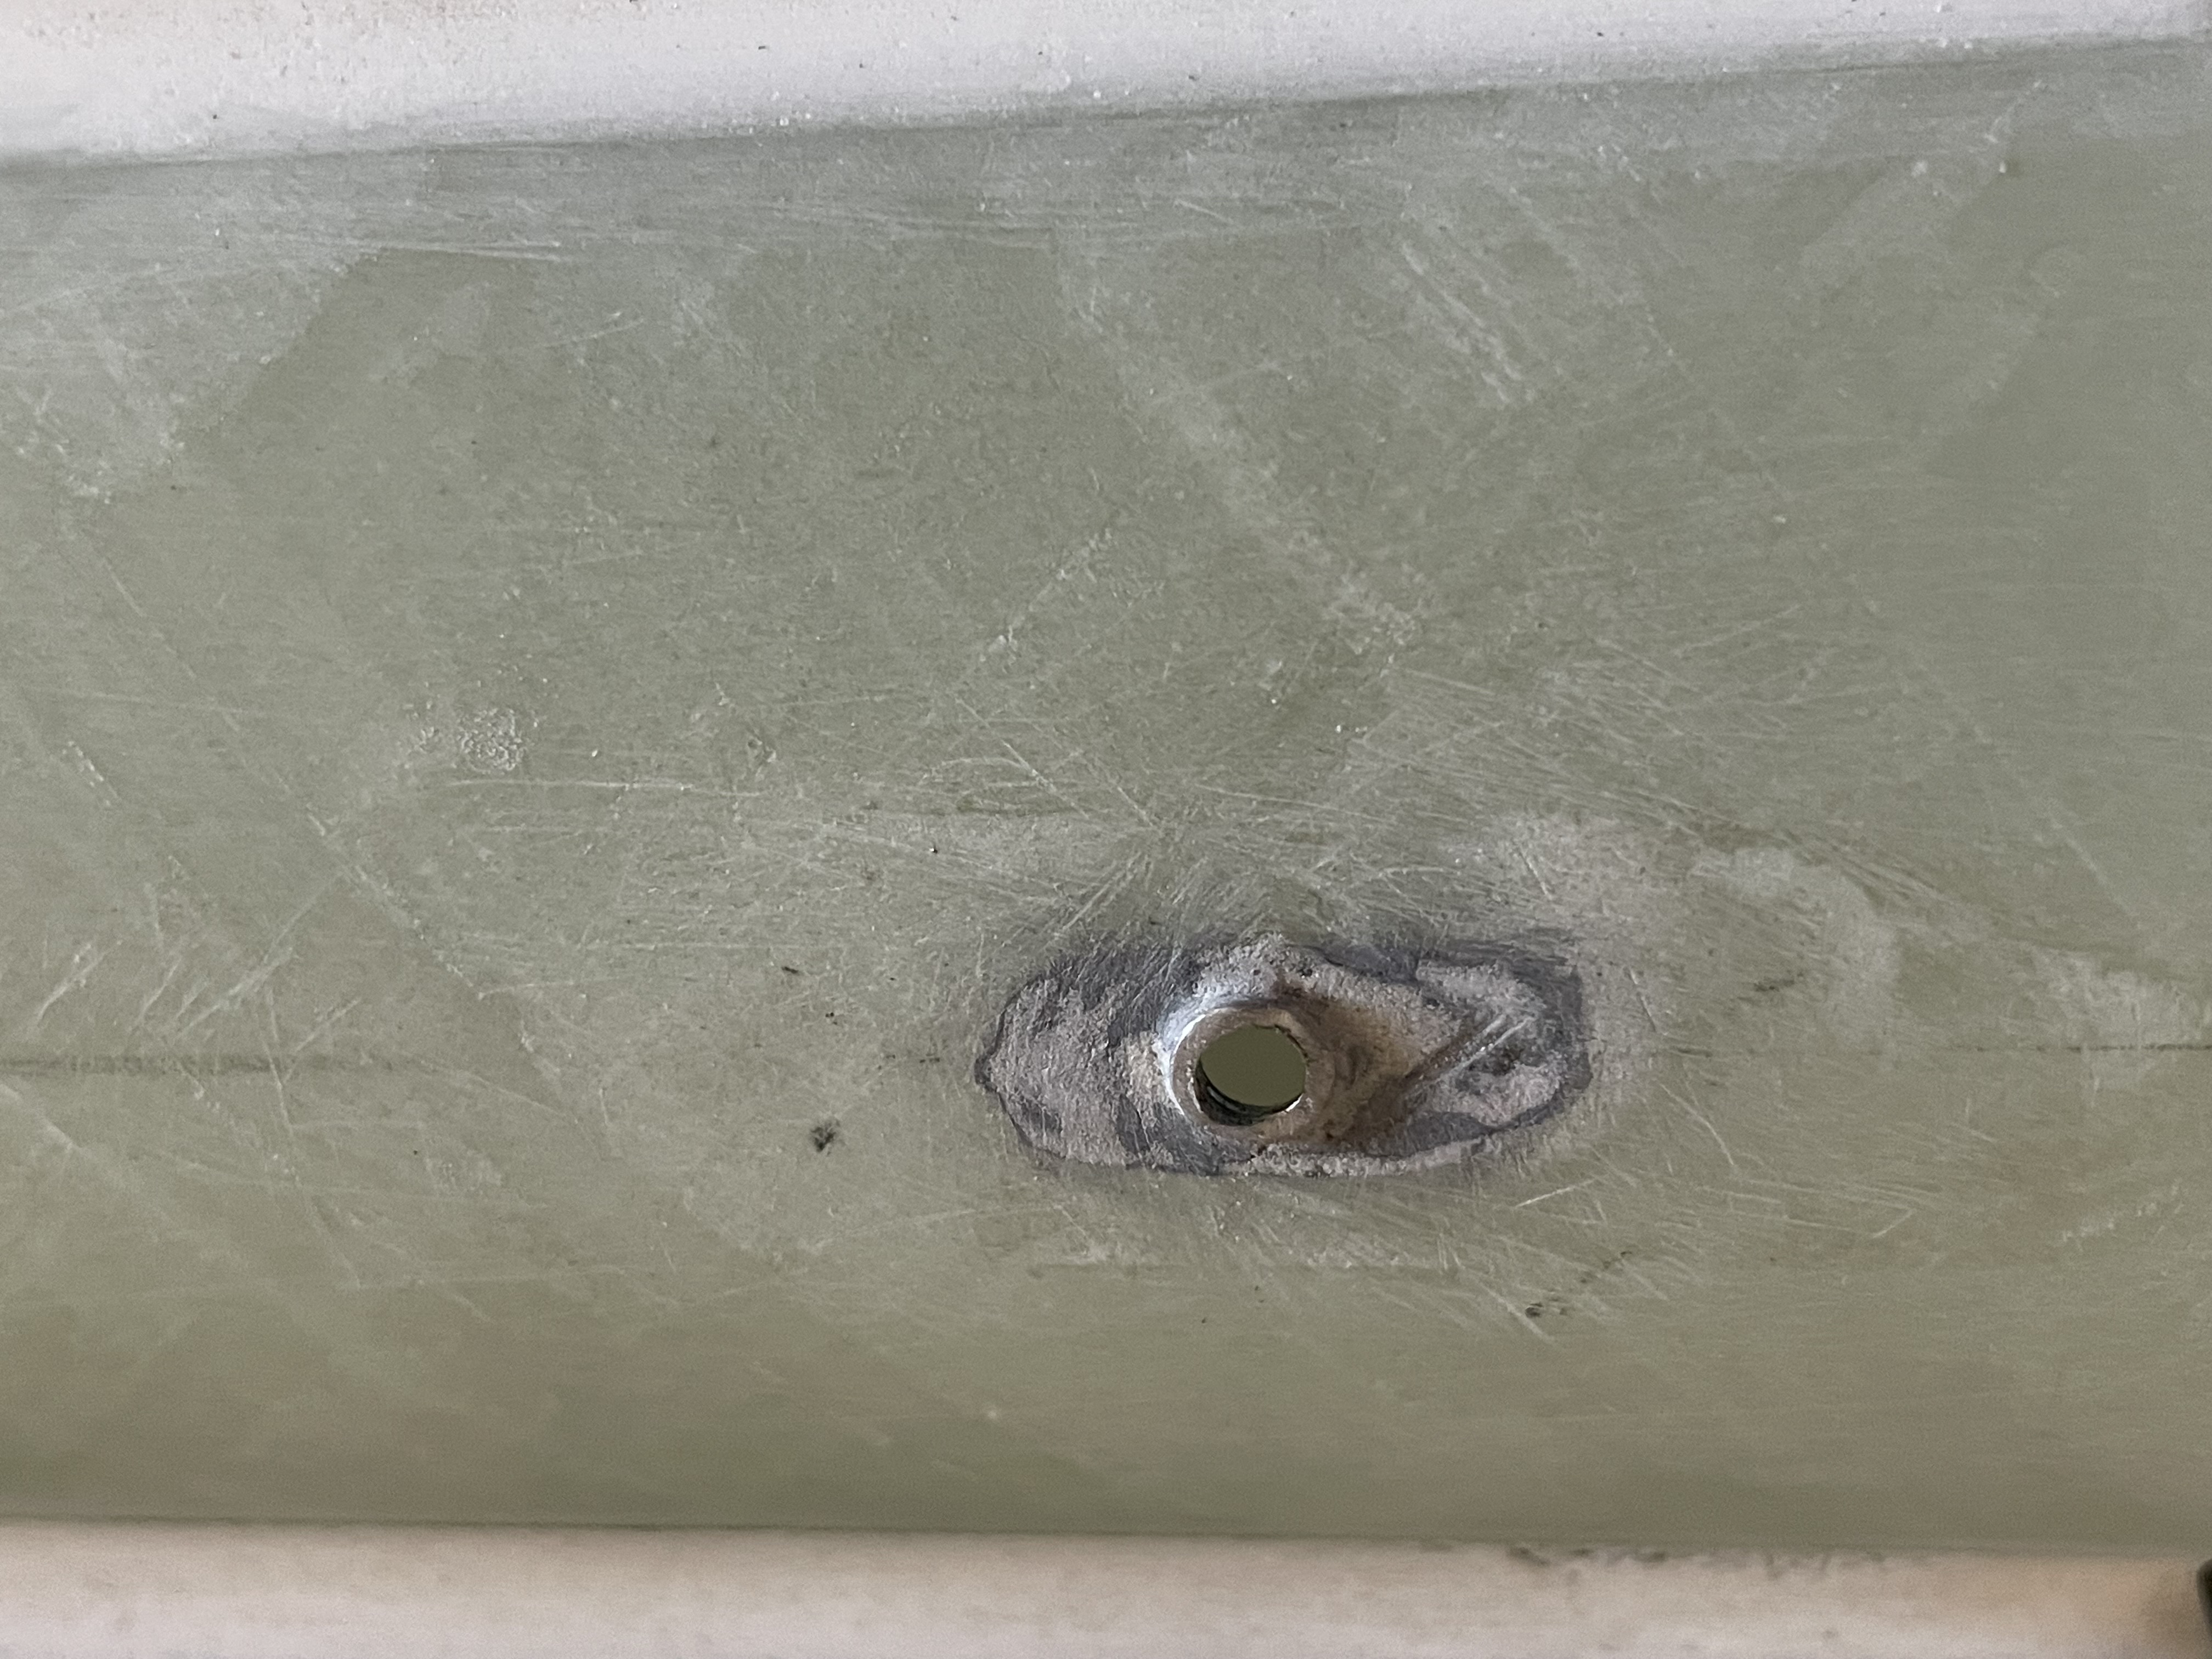
Next I drilled a hole the size of the 8-32 bolt (I think it was a #18 drill) in the airframe, inserted a bolt from the inside, screwed the t-nut in position and trace the shape of the trimmed t-nut onto the airframe. Then removed the t-nut and bolt. I used a Dremel tool to cut out the shape. The result is the following.

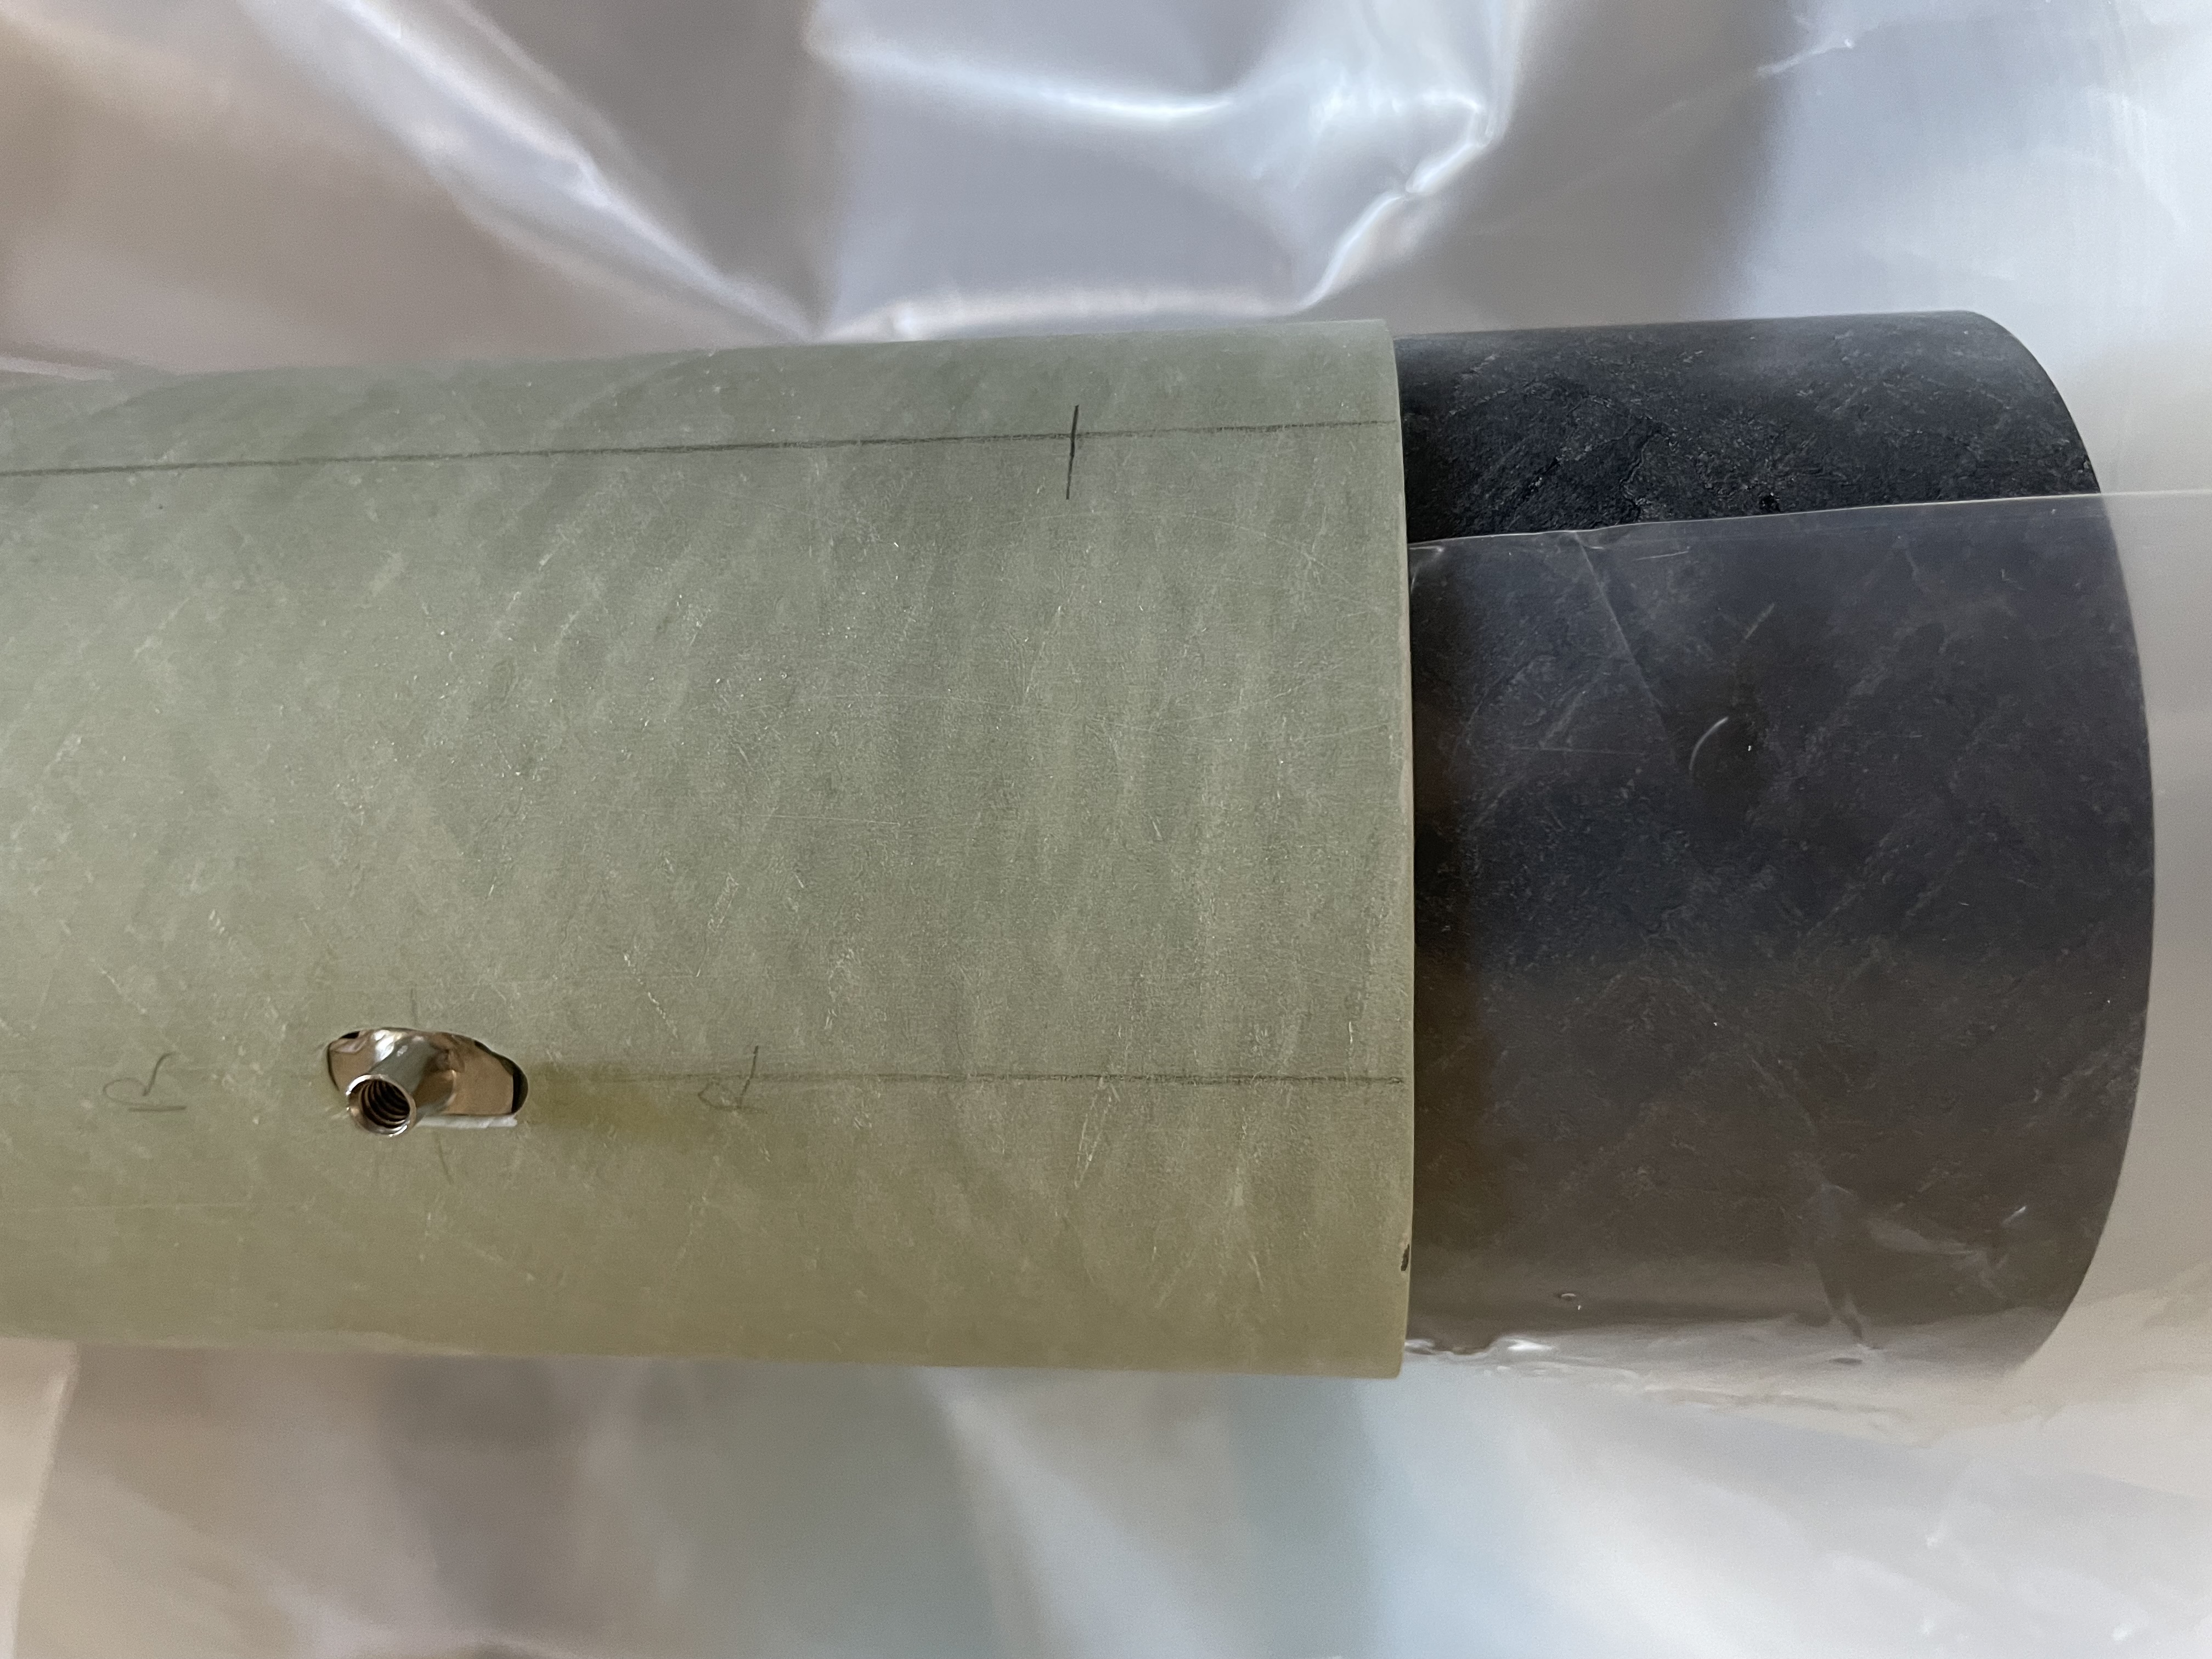
I inserted a section of coupler with a piece of polypropylene plastic (I think about 4-5 mil) as seen in the above photo to set the t-nut on. I used JB Weld to attach the modified t-nut to the airframe. This will be covered by the fin tip-to-tip carbon fiber. More on that later.
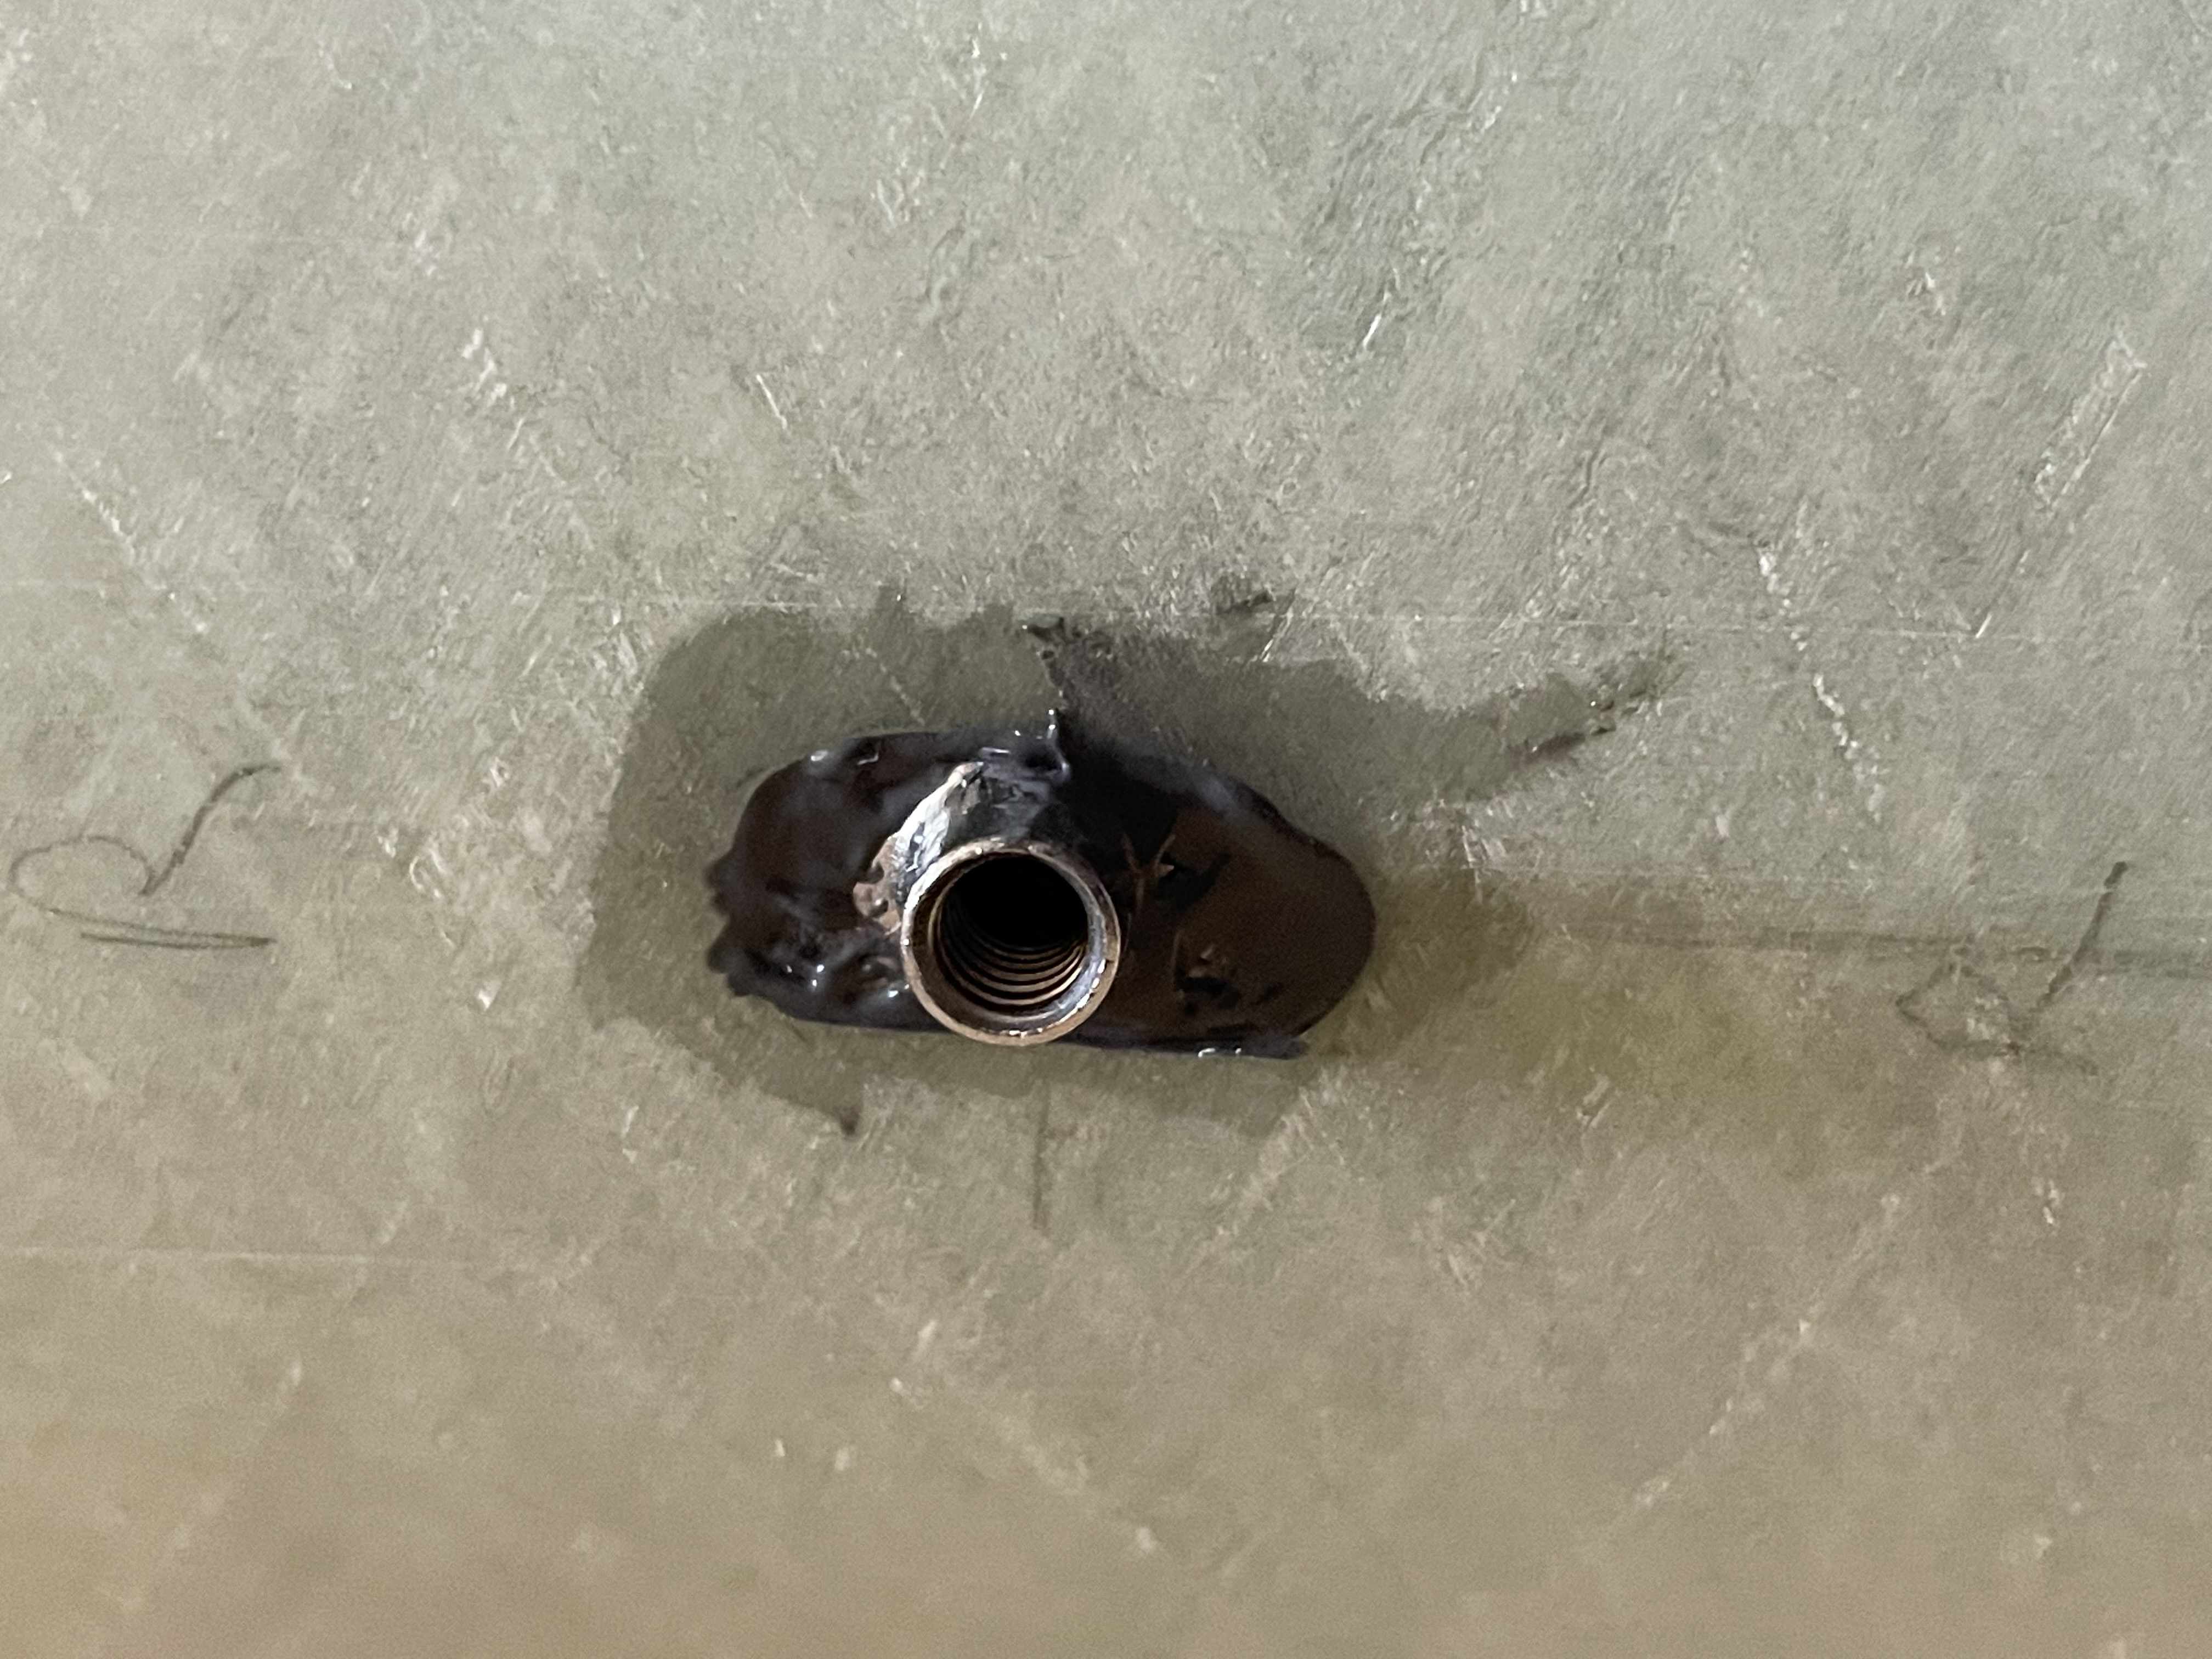
After the JB Weld cured, I used some microspheres in epoxy to smooth out the JB Weld and fill in any indentations so it's level with the airframe. I cut the threaded portion of the t-nut to a length of about 1/8". Now it's ready for the fin tip-to-tip carbon fiber lay-up.